Teach-in Ultrasonic Sensors. P44 Teach-in sensor end cap
The diagram shows the end cap of a PIL P44 Ultrasonic teach-in sensor. P1 indicates when the first switching point is active P2 indicates when the second switching point is active. The key is used to make settings.
P44 Teach-in sensor, teach-in procedure; step 1
In this diagram, the Teach-in sensors is operating and has not detected any object. Switching points P1 and P2 are set as delivered from the factory or previously modified. The analog output is +10V
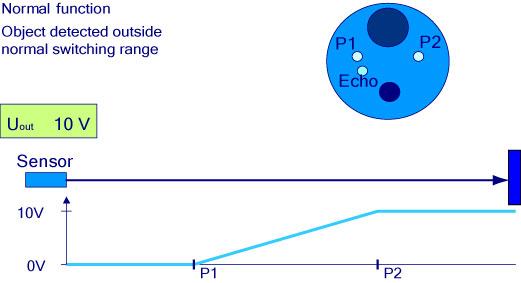
P44 Teach-in sensor, teach-in procedure; step 2
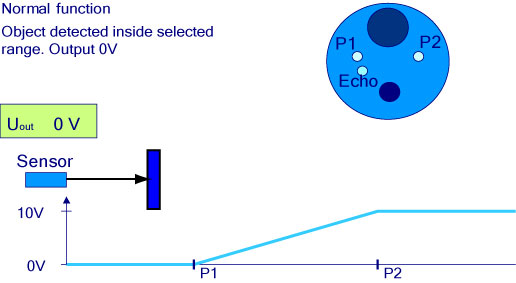
Normal function of sensor, an object is detected outside the selected switching range (P1 to P2). Output is 10V.
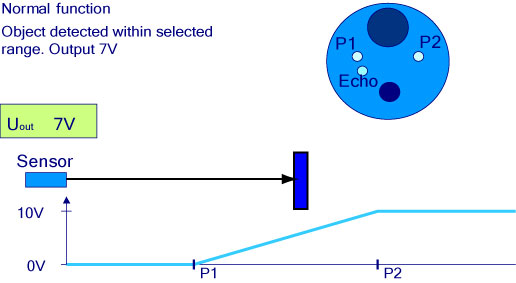
P44 Teach-in sensor, Teach-in procedure; step 3
Normal function of a sensor, an object is detected between the two switching points. Output is 7V indicating the distance from switching point P1 .
P44 Teach-in sensor, Teach-in procedure; step 4
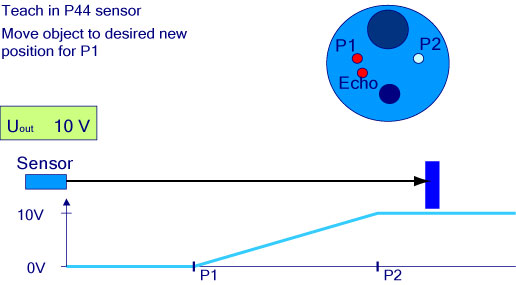
Normal function of a sensor, an object is detected inside switching point P1. Output is 0V indicating relative position of object. To "teach in" switching point P1 (0V) press key for approx 8sec until both echo LED and P1 LED are blinking Release key, echo LED blinks when object is detected, P1 LED is blinking.
P44 Teach-in sensor, Teach-in procedure; step 5
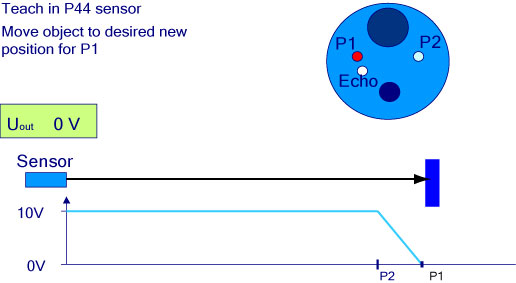
To "teach in" a new position for P1, move the object to the new position. The echo LED indicates that the object is detected, output is 0V. The echo LED is blinking
P44 Teach-in sensor, Teach-in procedure; step 6
Press and release the key; if the echo LED is on when the key is pressed the sensor has NO (normally open) characteristics; if LED is off the sensor is NC (normally closed). P1 is set in a new position, output is 0V
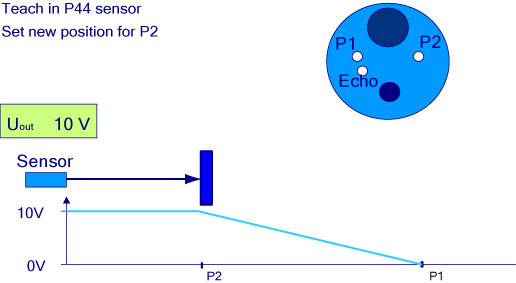
P44 Teach-in sensor, Teach-in procedure; step 7
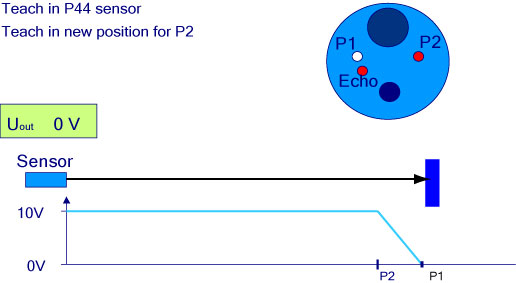
To set a new position for P2, press the key until the echo LED and P2 LED are blinking.
P44 Teach-in sensor, Teach-in procedure; step 8
Move the object to a new (10V) position for P2.The echo LED and P2 LED are still blinking. Output is 10V.
P44 Teach-in sensor, Teach-in procedure; step 9
With the object in the new position for P2, press and release the key. The sensor is "teached in" the new position for P2 output is 10V
|